


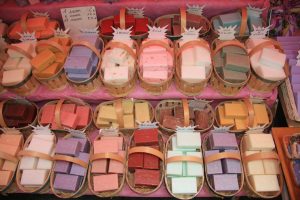
How much money have you spent over the years on specialty body products at cutesy boutiques? The selections of handmade goods might be inspiring, but the price tags on these items are no joke. Usually in prominent displays are homemade soaps and lotions in a wild array of colors and scents, and they’re almost irresistible to scoop up, no matter the price. However, few people realize how easy and affordable it is to make homemade soaps right at home. Next time some heavenly-scented soap display has you reaching for your wallet, remember this article and take the time to make some homemade soap for yourself. You’ll be well rewarded for your efforts.
Soap Making’s Fascinating History
Humans haven’t always relied on other people to make their cleaning products for them. In fact, throughout history soap making was an important household task for women. According to unverified legends, the term ‘soap’ came from the Roman word for a ritual site used for animal sacrifices. After a sacrifice, rainstorms would often wash down the remnants of animal fat and ash into the Tiber River. Women found their clothing came out far cleaner when they washed them after these rainstorms, and the practice of making and using soap expanded from there.
In the early years, all soap was made from animal fats (usually goat). By the seventh century, the French began to use olive oil and fragrances to make soap that was far gentler for skin and well suited for bathing, shampooing, and shaving. European royalty quickly took to soap, and Queen Elizabeth I set a standard of bathing with soap every four weeks, a shockingly frequent amount compared to her contemporaries.
Today, soap making has moved out of the realm of the homeowner and into the factory; but it doesn’t have to be that way. With some time and intentional practice, you can soon make your own soap in similar processes to how it has been made for thousands of years.
Why Make Homemade Soap?
You are forgiven if you think making homemade soap seems too overwhelming to take on. In fact, the opposite is true. In less than an hour, it’s possible to make enough soap to keep a family clean for months on end, and for less than half the price of buying it at the store. Best of all, once you make a recipe a few times it’s simple to make some ingredient modifications in order to make it your own.
Making your own homemade soap gives you complete control over the ingredients that you expose your body to. Skin is your body’s biggest organ (covering over 20 square feet of your body), and a protective layer for your muscles and internal organs. Even so, it’s a surprisingly porous layer that is designed to absorb beneficial substances right into the bloodstream, including Vitamin D, essential oils and herbal medicine.
However, the natural porosity of skin also means it can quickly absorb substances that are toxic. When you coat your skin with harsh chemicals, the toxins they contain are easily lodged into your muscles and tissues where they slowly compromise your entire immune system. Not only does this put you at risk of developing viral and bacterial infections, some of these chemicals have far more sinister health effects.
Commercial soap products are no exception. You might think products marketed for keeping your skin clean would also keep it safe, but the truth might shock you. Rather than making it easier to stay healthy, much commercially produced soap contain the following chemicals.
- Benzyl Acetate: A known carcinogen, Benzyl Acetate is also associated with pancreatic cancer and can irritate eyes and lungs.
- Benzaldehyde: As a nervous system depressant, too much exposure to benzaldehyde can cause vomiting, dizziness and dramatic drops in blood pressure.
- Ethanol: Known to irritate the respiratory tract and cause long term vision impairments that result in a loss of muscle control, ethanol has been categorized by the EPA as a hazardous waste.
- Sodium Laureth Sulfate (SLS): Designed to break down fats, SLS actually affects your skin’s ability to maintain moisture. Worst of all, this abrasive chemical is classified as a ‘mutagen’ meaning that it can alter genetic material in cells.
- Triclosan: As the main ingredient in antibacterial products, triclosan works as an antibacterial to prevent bacteria from reproducing. Over 75% of liquid soaps and 30% of bar soaps used in the US contain triclosan, yet studies have shown that people that use antibacterial soaps actually develop cold and allergy symptoms at the same rate as people using other soaps, meaning these chemicals actually produce little benefit for your health.
There’s a lot to be afraid of in commercial soaps, but thankfully you can avoid all these concerns by making your own. Not only will be able to personalize your beauty products to suite your tastes, you will have complete control over the kinds of ingredients you expose your skin to.
How To Make Homemade Soap
So you’re finally ready to take the steps towards total body health and make your own soap. Great! Before you begin, it’s important to have a recipe on hand and a collection of all necessary ingredients. Custom soap can be made with a wide variety of fats and oils. Some of the top oils that can be used for making soap are coconut oil, shea butter, cocoa butter, castor oil, olive oil, mango butter and avocado oil. Regardless of the type of oil you use, it’s very important to ensure you buy them from a high quality supplier and invest in organic products whenever possible.
The other supplies essential for making soap are as follows: glass jars and bowls, a stick blender, digital scale, plastic cups, metal spoon and wooden spoon, soap molds in whatever shape you want them to be, a crock pot (for some recipes) gloves and safety glasses, a spatula and a large bottle of white vinegar.
You most likely have these supplies already at home, but it’s important to keep a separate set on hand to prevent your food spatulas from getting contaminated with suds!

How to Customize Your Homemade Soap
While it’s important to follow soap making recipes for your first few attempts, there are plenty of ways to modify your soap to fit your fancy. Some of the top additives that you can use to make your soap truly memorable are essential oils of your choosing, dried herbs like lavender, chamomile, and calendula, brightly colored natural ingredients like beet juice, spirulina and turmeric, and fun textures like coffee grounds, oatmeal and sea salts.
Hot Process or Cold Process?
There are two main ways of making homemade soap: hot or cold processing. The main difference between them is whether heat is used or not. Cold processing creates a mixture of water and lye that is combined with oils in the process of saponification, while hot processing “cooks” the mixture in an extra step that makes the soap ready to use in a matter of days, rather than weeks like cold processing.
What About Lye?
When it comes to making soap, lye is the special ingredient that makes it all work out. Without lye, the fats, oils and water won’t bind together and your “soap” will look more like a greasy bucket of water.
Many soap makers are so terrified at the idea of working with lye that they give up their project for good. This is unfortunate, because lye is perfectly safe to handle so long as it’s used correctly. Even better, the process of making soap ensures that there won’t be any lye left in your finished product.
The reputation of lye comes from the fact that it’s a caustic chemical. This means it can eat holes in fabric and skin, and can cause some severe chemical reactions when mixed with other chemicals. For this reason, it’s extremely important to be careful when using lye. Always wear gloves and eye protection when handling it, and be sure to add lye to water, never the other way around. While it’s not possible to make soap without lye, you can keep yourself safe by handling lye smart. When buying lye, make sure to get it in a form that is 100% pure sodium hydroxide. Never use liquid lye or drain cleaners instead; these products are too hard to get an accurate measurement from.
If you’re truly squeamish about using lye, it’s still possible to make your own soap using melt-and-pour soap instead. Because this soap has already processed the lye, you can melt them down and add your own essential oils or herbal ingredients to get the final product you want. Further instructions can be found here.
Top Places for Soap Recipes
There are plenty of incredibly informative books and website full of tried-and-true recipes for making your own soap. My top recommendations for finding recipes that work are below.
Books:
- Making Soap From Scratch: How To Make Handmade Soap- A Beginner’s Guide and Beyond by Gregory Lee White
- Soap Crafting: Step-by-Step Techniques for Making 31 Unique Cold-Process Soaps by Ann-Marie Failoa
- Soapmaking the Natural Way: 45 Melt-and-Pour Recipes Using Herbs, Flowers & Essential Oils By Rebecca Ittner
Websites:
- Wellness Mama Slow Cooker Soap
- Natural Living Ideas Ten Amazing Soap Recipes
- Homemade Ideas 71 of the World’s Best Homemade Soap Recipes
5 Tips For Success
There’s a lot to keep in mind if you want your soap making venture to be a success. Follow these tips to ensure you have the best experience you can.
- It’s important to have separate tools just for soap making, even a separate crock pot. Even so, make sure you soak all your tools for eight hours when you’re done to ease the cleaning process.
- If you want an extra lathery soap with big bubbles, replace the water in the recipe for a sugar-filled drink like beer or wine.
- For sustained suds that last a long time, use castor oil for 5% to 10% of your recipe.
- To make the bar harder and more stable add between 1% to 5% beeswax to the recipe.
- If you want an extra conditioning soap, replace the water with a thick goat’s milk or yogurt instead.
Conclusion
Anyone can make their own soap if they put their mind to it. Your body will benefit from the soothing emollients and the worries of polluting your skin with toxic chemicals will leave you far behind. So long as you invest in the right equipment and aren’t afraid to tackle the challenge of using lye, there is no reason why you can’t start creating homemade soaps that amaze. The process is well worth it.