If you want to try your hand at gardening but don’t have the outdoor space to commit to a real garden, a smart solution is to grow some micro-greens. Once you get a crop going, you’ll be amazed at the multitude of uses you can find for this tasty, versatile garden plant.
What are Microgreens?
Sometimes referred to as “vegetable confetti” or “baby greens” microgreens are actually young versions of your favorite vegetable plants like broccoli, kale and collards. Though they are often confused with sprouts, microgreens differ because they are grown in soil and allowed to reach a larger size before harvesting, while sprouts are grown in water and eaten younger. Microgreens also undergo more photosynthesis during their lifespans, meaning that they contain more nutrients and fiber than sprouts. Like sprouts, microgreens are a source of concentrated nutrition and full of beneficial enzymes that your body gets a boost from.
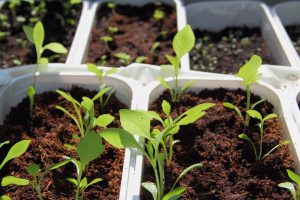
If sprouts are the babies of the plant world, then microgreens are the toddlers. Within a month of planting, microgreens form their first leaves (called cotyledons) and are ready to be snipped off with a scissors and added to a wide variety of culinary masterpieces.

Benefits of Growing Microgreens
Besides looking really cute for your Instagrammed salad shots, microgreens have plenty of benefits that make them well worth the effort of growing from home.
Simple To Grow In Small Spaces
If you’re short on space, there’s no better garden plant to grow from home than microgreens. Not only do they take less than four weeks to reach maturity, microgreens also thrive when grown close together, meaning you can pack a ton of plants in a tiny area. It’s also incredibly cheap to start them from scratch as all you will need is less than a bag of potting soil, some planters and your seeds. All you need is a flat space with good air circulation and plenty of natural light to get your greens growing in no time.
In fact, many urban gardeners have found the benefits of microgreens to be so inspiring that they have turned their hobby into a lucrative business, growing and selling microgreens to friends and nearby restaurants. With enough motivation, you too can start your own small scale farming business; right from the windows of your apartment.
Health Benefits
Not only are microgreens simple to grow, they are also full of vitamins and nutrients that put full grown vegetables to shame. In fact, many nutritionists consider microgreens to be a superfood beyond compare. A study by the Journal of Agricultural and Food Chemistry found that microgreens contained higher concentrations of vitamins and carotenoids than the mature versions of the same plants. The first leaves of each plant, the cotyledons, were found to contain higher levels of carotenoids than the older leaves did later on. Other studies found that microgreens grown from red cabbage seeds contained over 40 times the amount of vitamin E and six times as much vitamin C as full grown cabbage. Best of all, because microgreens are so simple to grow right from home, you can carefully monitor the quality of soil they grow in and keep pesticides far away, thereby ensuring you are growing a truly healthy, organic food item for your family to enjoy.
Tasty Four-Season Food Additive
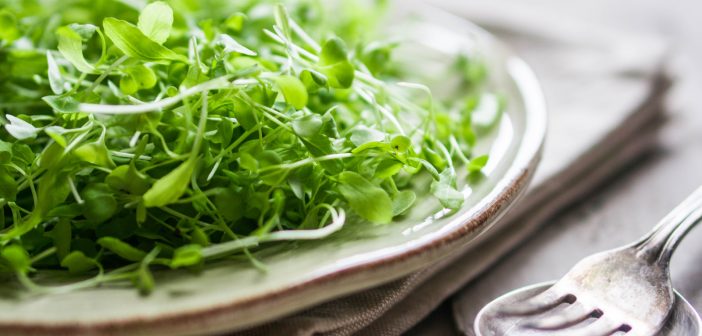
Getting high quality organic produce in the mild of the winter can be tricky and expensive, but if you grow your own microgreens you’ll never be short of a solid supply of fresh salad greens. The flavor profile of your greens can vary considerably depending on the type you plant, meaning you can enjoy any flavor from spicy to sweet in your favorite recipes. You can use microgreens in recipes as a top quality substitute for lettuce and other cooking greens, and they can be added to salads, sandwiches and stir fries for a fresh tasting crunch.
Types of Seeds
Almost any type of green can work for growing microgreens, but some forms of seeds tend to be tastier than others. Popular microgreen varieties include beets, broccoli, cabbage, basil, kohlrabi, kale, mustard, parsley, peas, radishes and more. For beginners, it’s often best to grow one type of seed at first, but there’s no need to limit yourself to a single variety when there are so many delicious seed mixes to experiment with. You can buy spicy mixes to add some zing to your cooking, or try an Asian Baby leaf mix to supplement your stir fries. Just keep in mind that it’s best to buy microgreens premixed or to grow each variety in a different container, because the variation in growth rates for different types of plants can make it tricky to harvest your greens otherwise.
Keep in mind that not all seeds lend themselves to growing great microgreens. It’s a smart idea to stay away from treated, non-organic seeds because the pesticides will be concentrated in the plant during the microgreen stage and it may cause you form health problems if you eat them. Without exception, organic seeds are always best when growing microgreens.

Steps For Growing Your Own Microgreens
It’s a surprisingly simple process to grow your own greens. Before you start, gather together all the supplies you need, including planting trays, organic seeds, an organic potting mix, paper towels and some seaweed solution.
The first step for growing your greens is to pre-soak the seeds (especially larger ones) in warm water for several hours. Next, lay moistened paper towels on the bottom of the planting tray and fill the container up 3/4 with potting soil, making sure it is moist before adding it.
Next, sprinkle your seeds over the mix and lightly press them into the soil. Gently mist the surface of the soil with a spray bottle and place the container in a drainage tray to catch the excess water before moving it into a warm, sunny spot.
Check the soil moisture every day by lightly touching it with your fingers and misting it with your spray bottle when it feels too dry. Seeds need to be kept moist to fully germinate, so don’t let them dry out!
The seeds should sprout in a matter of days and grow quickly. Once their first leaves have unfurled and the plants are between one and three inches tall, they are ready to harvest. Simply snip the plants off close to the roots and use them immediately or store them in the fridge for up to a week.
6 Tips for Growing Gorgeous Micro-Greens
Looking for some additional suggestions about how to get your greens to grow like crazy? These extra suggestions are sure to help you out.
- Birds and rodents love to snack on newly planted microgreen seeds, so if you choose to grow yours outside be sure to protect them with some animal netting until they have fully sprouted.
- Beet and radish greens need to grow longer roots, so make sure to plant them in a deeper container to let them fully stretch out.
- For a continuous harvest, plant only a few seeds at a time but plant them continuously. This ensures that you’ll always have greens ready to harvest when you want them.
- If you can’t tell if your older seeds are still viable for planting, sprout some on a paper towel on water like you do for growing sprouts to see how well they come up.
- In order to create a warm, humid environment for your seeds to germinate in, cover the planting tray with a punnet lid or clear plastic bag with holes snipped throughout it. This helps the soil to retain heat and moisture while still allowing a good airflow.
- Keeping your microgreens growing as lush as possible by taking the time to inject a liquid seaweed solution to each tray. Your greens will perk up from the extra nutrition.
Conclusion
Growing your own food is easier than most people think. By producing your own microgreens, you’ll be able to easily supplement your regular diet with fresh, healthy produce grown right in your kitchen. Whether you’re looking for a way to become more self-sufficient or simply want a tasty condiment to incorporate into your cooking, growing microgreens is a fun hobby that produces truly tasty results.
